Given those numbers, one would assume that the service would be accessible to users of all major platforms. Sadly, that’s not the case. While official clients have been available for Windows, Android, and OS X from day 1, iOS and Chrome OS also made it to the list soon. Notably missing from the list, however, is Linux. The Mountain View, California-based company did say in 2012 that “the team is working on a sync client for Linux.” which was followed by “the team is working on a sync client for Linux” in 2013, but it never shared an exact time-frame. Understandably, Linux users are unhappy and frustrated, with entire Reddit threads dedicated to discussing Google’s apathy towards them. While we still don’t know if and when an official Google Drive client for Linux will arrive, thankfully there are various unofficial alternatives available that can do the work for you. In this article, we will be discussing four of them: Grive2, drive, overGrive, and Insync. Note: All clients were tested on Ubuntu 16.04, and all the commands mentioned in the article are Ubuntu-specific.
1. Grive2
Grive2 is a fork of the now-abandoned Grive client for Google Drive that stopped working after the Document List API it used was shut down. The new iteration, which is developed by Vitaliy Filippov, uses Google Drive REST API to talk to the search giant’s cloud storage service. Before we begin with the installation and set-up part, it’s worth mentioning that Grive2 is still in beta phase, meaning there are some missing features and the tool may sometimes act buggy as well.
Download and Install
The first step is to download the latest Grive2 package from the tool’s official GitHub page . Once done, you’ll need to then install the tool’s dependencies before building the tool itself – here’s the command to do it: Now, extract the downloaded Grive2 package (.zip file), and enter into the extracted directory. Here, run the following commands to build and install the tool:
Setup
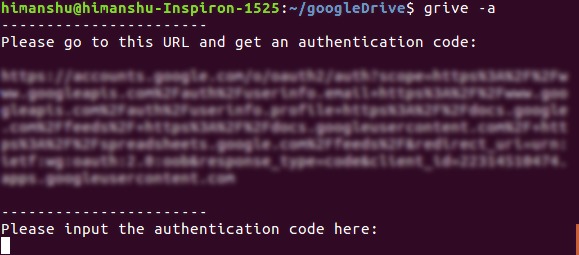
Next up, create a directory where you want your Google Drive stuff to be synchronized. For example, I created a directory dubbed googleDrive in my home directory. Once done, enter into the newly created directory, and execute Grive2 through command line by simply typing the following command: Note that ‘-a’ is necessary when running Grive2 for the first time as it helps the client connect to your Google Drive account. As you can see in the output below, you are required to head to a URL, where you’ll be asked whether or not to allow this application to access your Google Drive account. Once the permission is given, a code is presented which you’ll have to enter on the command line:
That’s it. Assuming that all the steps mentioned till now are executed successfully, Grive2 will start downloading your Google Drive files locally. Keep in mind that you’ll have to run the ‘grive’ command (sans ‘-a’) each time you want the synchronization to happen – for help, run the command with ‘–help’ flag. To learn in detail about the tool’s features as well as its limitations, head here.
2. overGrive
overGrive is a GUI-based client for Google Drive. The project started as a graphical front-end to the now-defunct Grive command line client, but soon turned into a separate, full-fledged client for Google’s cloud storage service. Unfortunately, overGrive is neither open source, nor a freeware – it’s a proprietary software that sets you back $4.99 per Google Drive account. However, it does come with a 14-day free trial for you to judge whether or not it’s worth paying for.
Download and Install
The first step is to download the overGrive package, something which you can do from its official web site. For Ubuntu, you’ll get a .deb file, which you can install using the ‘dpkg’ command. Here’s how I did it in my case: In my case, the command above failed initially with the following output: So, as you can see, there were some unmet dependencies, something which I fixed by running the following command: And executed the ‘dpkg’ command again – this time it was successful and the client was installed. To launch overGrive, head to the Dash:
Setup
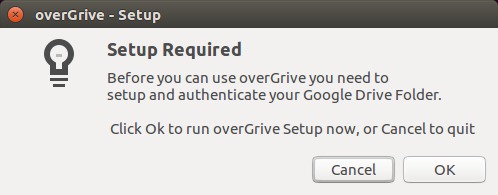
When the client is launched for the first time, you’ll be required to run a set-up that’ll effectively connect the client to your Google Drive account.
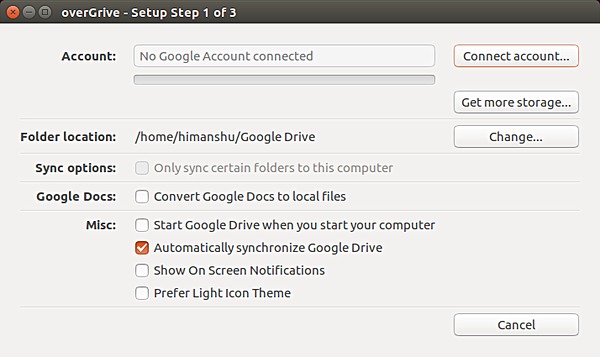
Click the ‘Ok’ button in the window above, and you’ll see the following window:
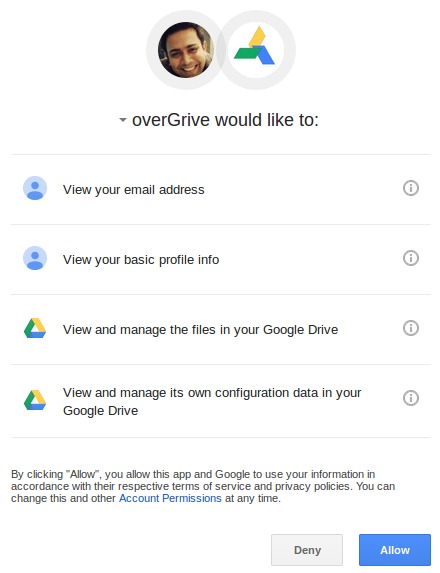
Here click the ‘Connect account’ button. This will open a web page where you’ll be asked to authorize oneGrive to access your Google Drive account.
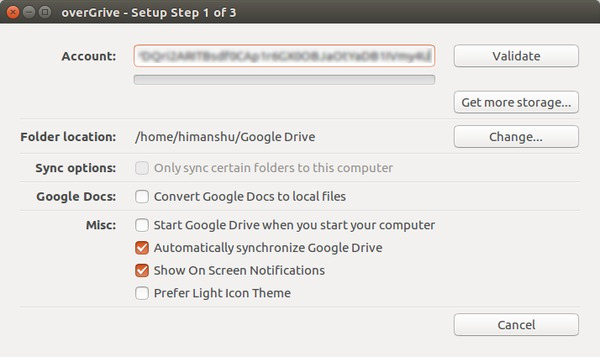
As you click the ‘Allow’ button, you’ll be presented with a code, which you’ll have to enter in the client’s window (the blurred portion in the image below):
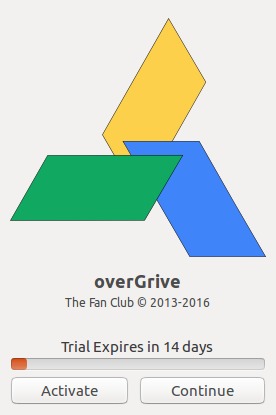
Then, hit the ‘Validate’ button. Strangely, in my case, after I hit the ‘Validate’ button, the oneGrive window disappeared as if the software crashed. I waited for a minute or so and then again opened overGrive through Dash. This time, I was presented with a window telling that oneGrive is currently running in a trial period which expires in 14 days.
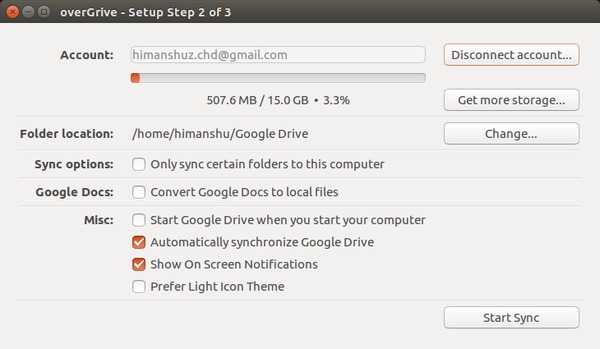
In case you encounter the same situation, you should hit the ‘Continue’ button as the ‘Activate’ button takes you to the client’s official website, presumably for a license purchase. Hitting the ‘Continue’ button brings up a window that shows the client is now connected to your Google Drive account.
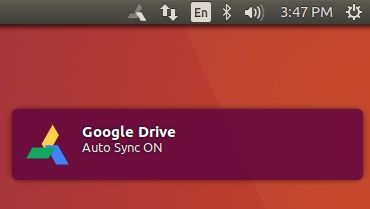
Hit the ‘Start Sync’ button, and the client window will disappear with the oneGrive system tray icon appearing at the top right of your screen. A notification will also be displayed saying that the ‘Auto Sync’ feature is ON.
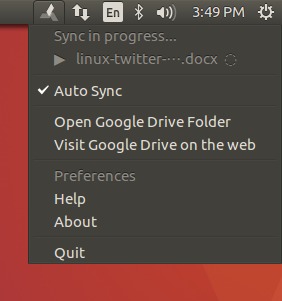
Click the client’s system tray icon and you’ll see that the sync process has already begun.
You can also toggle the ‘Auto Sync’ feature from here, as well open the local directory (where your Google Drive stuff is being synced) and visit the Google Drive Web interface. For more information on the tool, including the complete set of features it provides, head here.
3. drive
‘drive’ is a command line Google Drive client that lets you push and pull stuff to/from the search giant’s cloud storage service. Although it may seem one, ‘drive’ is actually not yet-another third-party Linux client for Google Drive – it’s written by a Google employee Burcu Dogan who works for Google Drive’s platform team, and what more, Google even holds the copyright for the tool. For the past year or so however, Dogan has been busy, so the project is being maintained by Emmanuel T Odeke (odeke-em).
Download and install
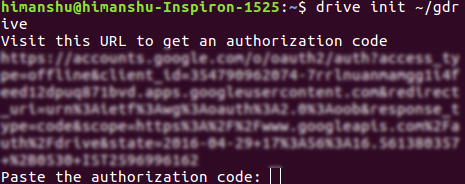
Before you go ahead and install ‘drive,’ make sure you have version 1.5.X or higher of Google’s GO language compiler installed on your system. To download and set-up the environment for GO, see instructions here. Now, you can proceed to install the ‘drive’ client – here’s the command for it: Once the above command is done, create a directory where you want ‘drive’ to sync your Google Drive stuff. For example, in my case, I created a directory named ‘gdrive’ in my home directory: And then run the following command: As usual, you’ll be first required to connect the client to your Google Drive account, so when you run the above command, it will ask you for authorization:
Go to the link displayed on your terminal screen, authorize the client to connect to your account (make sure you’re already logged in to your Google Drive), and finally copy the code you get there and paste it in terminal. Now, you can do a ‘drive pull’ to download data from your Google Drive account to your local machine and ‘drive push’ to do vice-versa. Here’s an example of pull: From the client’s official documentation, “the pull command downloads data that does not exist locally but does remotely on Google drive, and may delete local data that is not present on Google Drive. Run it without any arguments to pull all of the files from the current path.” And here’s an example of push: Here’s what the documentation says about push: “The push command uploads data to Google Drive to mirror data stored locally. Like pull, you can run it without any arguments to push all of the files from the current path, or you can pass in one or more paths to push specific files or directories.” In case you’re wondering why ‘drive’ follows the push-pull model, rather than background sync, here is what the tool’s official documentation has to say on this. For more information on ‘drive,’ head here.
4. Insync
Insync is a GUI-based, feature-rich Google Drive client that works on several platforms including Linux. However, like OverGrive, Insync is also a proprietary software – it costs $25. The amount charged can be one-time or per-year depending upon whether you are an end-user, professional, or an organization. Thankfully, Insync provides a 15-day free trail, so you can test it out before deciding whether or not to spend your money on it.
Download and Install
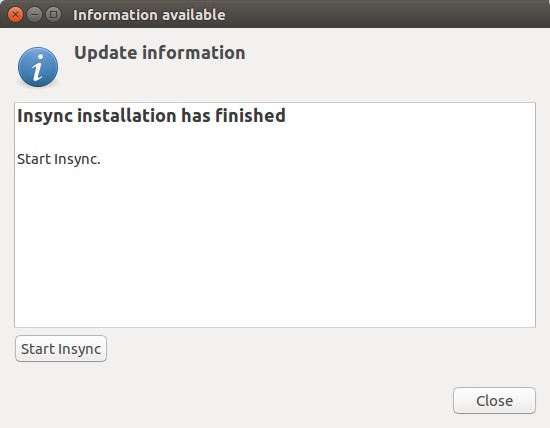
To download Insyc on your system, download the package/installer for your system from the tool’s official website. For Ubuntu, a .deb file will be downloaded, which you can easily install using the ‘dpkg’ command. Here’s the command in my case: Once done, you’ll see a notification similar to the following:
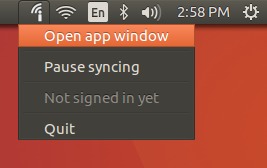
Hit the ‘Start Insyc’ button in the window above, and you’ll see the ‘i’ icon (see image below) in the system tray:
Setup
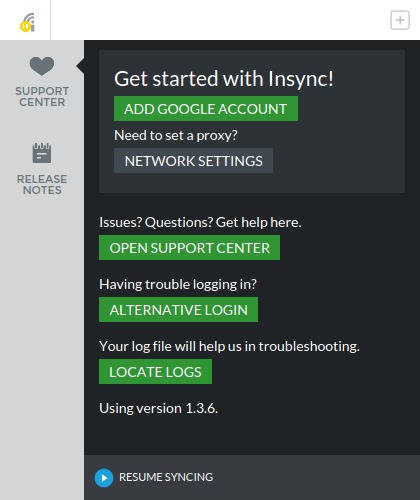
Click Insync’s icon in system tray and then click the ‘Open app window’ option to launch the UI:
So, like in the case of any other client, here also the first step is to connect the client with your Google Drive account. So, hit the ‘ADD GOOGLE ACCOUNT’ button in the UI. It will open a web page asking you to allow the client to access your account.
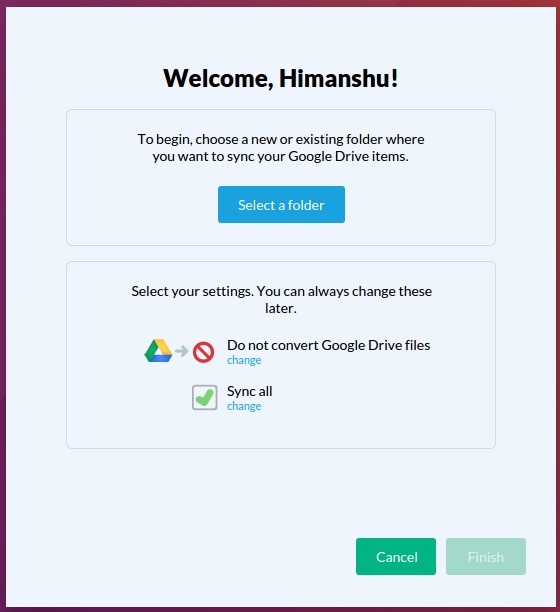
After you authorize, the client installed on your machine will ask you to provide a directory in which you want it to sync your Google Drive stuff:
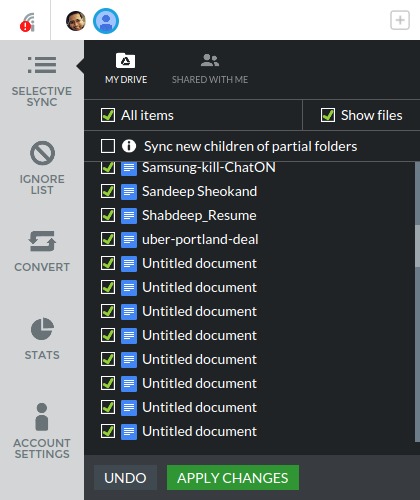
Once you’re done with this set-up, hit the ‘Finish’ button. Now, when you’ll open the client UI, you’ll see the files and folders stored in your connected Google Drive account as well as options detailing how you’ve configured Insyc to handle them.
The grey-colored column on the left contains various configuration options that are available to the user. For example, Selective Sync lets you choose which files you want the client to sync; Ignore List lets you specify the files/folders that you don’t want to upload/download; Convert lets you specify whether or not you want to convert stuff stored in your Google Drive into some other format like Microsoft Office or OpenDocument; and Stats gives you a chart showing how much of your Google Drive space has been consumed. For more information on the client, head to this link on Insync’s official website. If you’ve installed the tool and have some related doubts/queries, head to the official support page. SEE ALSO: 10 Best Linux Music Player Apps
Conclusion
All Google Drive clients discussed here have their own strengths and weaknesses, so it would be unfair to say which one is the best. It all depends on your requirement – for example, whether or not you need a GUI-based client, are you willing to pay for it, what kind of feature set you require, and more. Also keep in mind that the list we’ve discussed here is not exhaustive – other third party alternatives like Rclone are also available. So, you can take a look at them as well if all of the above fail to impress you.
![]()
