Get Water Out of Your iPhone (Updated May 2021)
Regardless of whether your iPhone has an official IP rating, it’s not recommended to submerge the device in water. That’s because Apple doesn’t cover water damage under warranty, even for iPhones with an IP rating. So if something goes wrong, Apple will leave you out to dry (pun intended). More often than not, water gets logged in the iPhone’s lightning port or speaker and makes it sound muffled. However, in some cases, you might find water or moisture inside the camera lens as well, and it is more difficult to dry out. So in this article, we will show you how to get water out of your iPhone’s lightning port, camera lens, and more. Plus, we will see how to dry out your iPhone with and without rice. You can use the table of contents below to navigate to any section in this article.
How to Get Water Out of iPhone Speakers and Charging Port
Since this is the most common issue that people face with their iPhones, this is what we will be discussing first. If you want to get water out of your iPhone without rice, here are plenty of methods, including apps, Siri shortcuts, and more. You can use them to get water out of your iPhone speakers and charging port. Let’s take a look at them one by one.
First, Try Using Gravity
The first thing you should try is to use gravity to rescue your water-damaged iPhone. Simply point your iPhone’s speaker towards the floor and gently tap on the top of your iPhone. You can also try tapping around the frame of your iPhone to get water out of the device. This simple trick might also be able to dislodge any water droplets stuck inside your iPhone speaker and allow them to flow out of the speaker grill and onto the ground.
Get Water out of Speaker Using Siri Shortcut
As many of you may be aware, the Apple Watch comes with a handy way to get water out of the speaker grilles. It allows you to play sounds to get water out of the speaker, and it’s effective. Surprisingly, the iPhone doesn’t have any such built-in methods. But that doesn’t mean you can’t make one for yourself or use Siri shortcuts created by other iPhone users to eject water out of iPhone speaker. Follow the steps below:
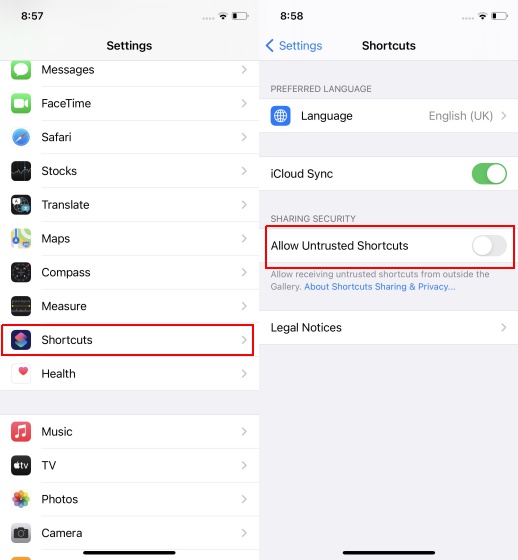
First, you need to enable the installation of untrusted shortcuts on your iPhone. Go to Settings -> Shortcuts and toggle on the “Allow Untrusted Shortcuts” option. You will need to enter your passcode to confirm the action.
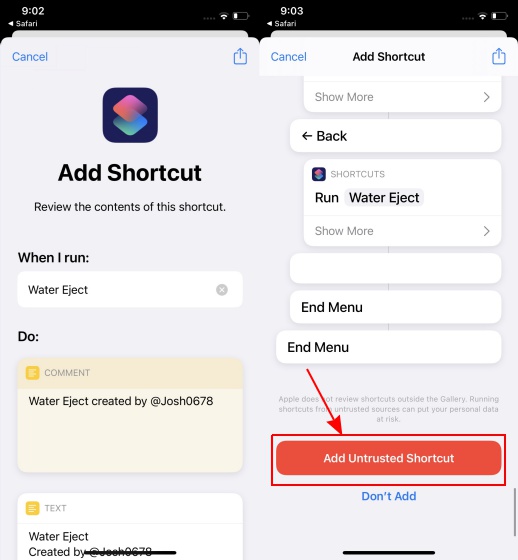
Next, download the “Water Eject” shortcut from this link and add it to your iPhone. You need to scroll to the bottom of the “Add Shortcut” page that opens up, and tap the “Add Untrusted Shortcut” button. This is a nifty shortcut created by user Josh0678 and you can browse more such shortcuts using this link if you’re interested in that.
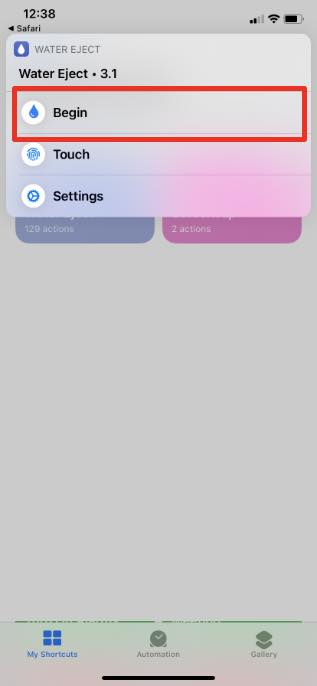
Now, open the Shortcut app and go to the “My Shortcuts” tab. Here, tap on the “Water Eject” shortcut. Choose “Begin” from the menu that pops up, and the shortcut will start doing its work. You will hear a series of sounds while the shortcut is running, and the water should start spraying out of your speaker.
Note: For better results, point your iPhone’s speaker towards the floor to allow gravity to help out as well. Also, don’t use the shortcut while using AirPods or headphones.
Use an App to Eject Water out of Speaker
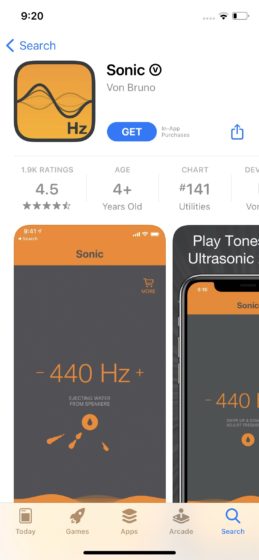
If Siri Shortcuts aren’t your thing, or you don’t trust a Shortcut created by an anonymous user on the internet, you can try out apps that offer similar functionality. The app most people recommend to get water out of the iPhone speaker is called Sonic.
Download Sonic from the App Store (Free).
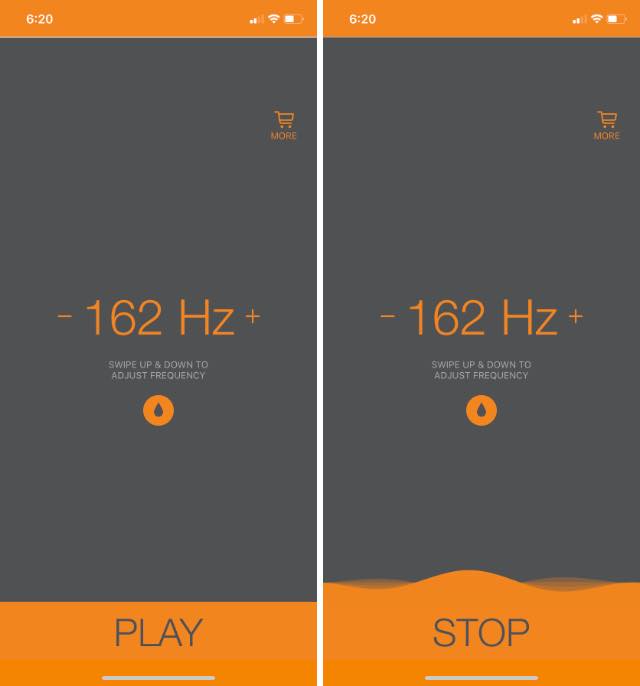
Launch the app once it is installed. Sonic uses sound waves to help you get water out of your iPhone speaker. It lets you choose the frequency of the sound it will play through your speaker, which means you can experiment with high-pitched and low-pitched sounds to get the best results.
Once you’ve selected the frequency you want to use, tap on “Play”. After the water is done being expelled, tap on “Stop” to stop the sound. This app should remove water from your iPhone speakers for you, plus it’s free to use, which is amazing. Note: While playing the sound, swipe your finger up and down on the screen to adjust frequencies in real-time. This can help expel water more effectively.
Use a Website
If neither an app nor a Shortcut sounds like a good idea to you, there are also websites that let you play sounds to remove water from iPhone speakers. Here is how it works:
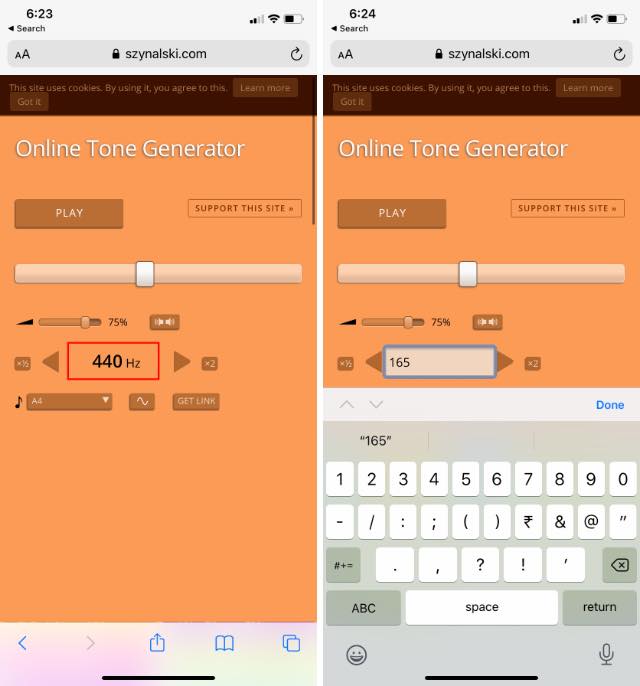
Head over to this website on your iPhone.
Here, tap on the frequency value (it will show 440Hz by default) and enter 165Hz.
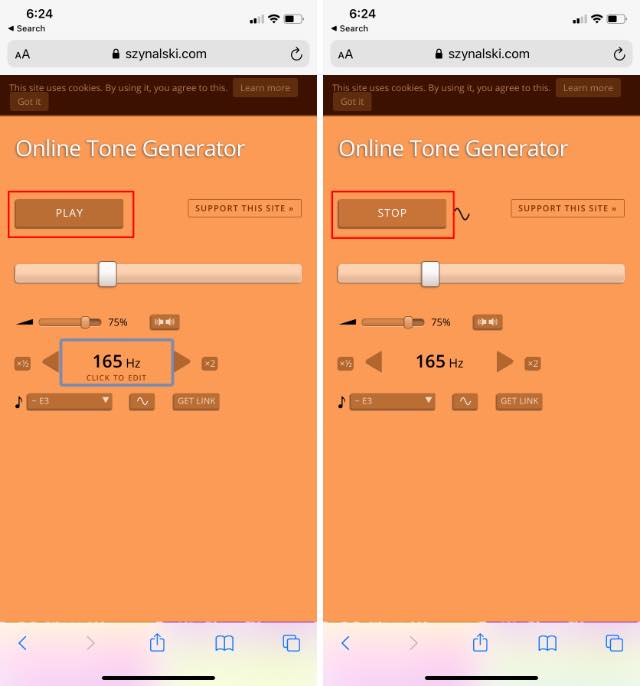
Click on the “Play” button to start playing the sound. This should help eject any water that’s stuck in your iPhone speaker with ease.
Use Rice to Fix a Water Damaged iPhone
Using rice to fix water damage in electronics is something many people swear by. I have never used this method and can’t vouch for its effectiveness. However, rice is a pretty good absorbent, which means it can help your water-damaged iPhone to some extent. The process is simple. Power off your iPhone and submerge it inside uncooked rice. Make sure to submerge it completely within rice for a couple of days. The rice should be able to absorb at least some of the moisture from your iPhone. This trick can be helpful to solve problems such as moisture inside the iPhone camera lens, the charging port, etc.
Use Silica Gel to Fix a Water Damaged iPhone
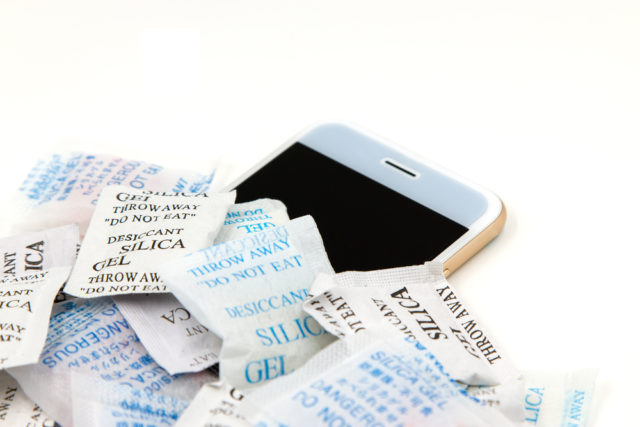
While rice has been known to work, there’s one thing that absorbs a lot of moisture, and it’s called silica gel. You must have seen packets of these inside shoe boxes or bags that you buy. These little packets filled with silica gel absorb all the moisture and ensure that your clothes, bags, shoes, etc., don’t get damaged due to humidity. So if you have silica gel at hand, you should try using them to help you fix your iPhone with water damage. Cover your iPhone with silica gel packets and leave it be for a day or two. That should help absorb all the moisture from your iPhone. Note: This method is most effective if you tear open the silica gel packets and bury your iPhone in the little beads of silica gel that are inside the packets. However, it can also be slightly risky because you might end up bursting these beads of silica gel.
How to Get Water Out of iPhone Camera
If you have moisture stuck inside your iPhone’s camera glass, it can make your pictures come out blurry and spotty. Plus, that’s not good news for your iPhone’s life either. The easiest method that you can use to try and get water out of your iPhone’s camera is burying the device in rice or between packets of silica gel. They will absorb the moisture out of your iPhone camera, screen, charging port, etc. You can read the sections above to get more details about how to use rice and silica gel to remove water from the iPhone camera lens. On the other hand, if your iPhone camera is freezing or you’re seeing a black screen, we suggest you check out our linked troubleshoot guide.
Take Your iPhone to Apple for Service
If nothing works or if you simply want an expert to take a look at your iPhone, you can take it to your nearest Apple Store or certified service center. The Apple Genius or the repair experts should be able to help you get rid of moisture or water from your iPhone. They may even be able to fix your iPhone if something is out of order. However, do note that iPhones come with water damage indicators, so your repair executive will know of the water damage. There’s no use trying to hide that fact from them.
DIY Solutions for Fixing a Wet iPhone
Note: We do not recommend opening an iPhone on your own. So try this at your own risk. For people who fancy themselves as a DIY enthusiast, you can try opening up your iPhone and drying it out yourself as well. Opening an iPhone on your own will let you easily dry out any water that may have seeped inside your iPhone’s body, and not just the charging port or speaker. Plus, you can clean it out properly, which is better than using rice or silica gel. Do note that silica gel will work even better if you open up your iPhone and then bury it under silica gel packets. Also, we would like to remind you that opening your iPhone will void your warranty. So make sure you only do this if you’re out of warranty coverage or confident in your ability to open and fix your iPhone.
Save Your iPhone from an Untimely Death Due to Water Damage
Losing an iPhone to water damage can feel irritating because you might feel almost helpless. Plus, even with newer IP-rated iPhones, there’s no guarantee that your iPhone can survive being exposed to water in any way, shape, or form. If you’ve used your iPhone in the rain or accidentally dropped it in the pool, you should check that there’s no water stuck in the Lightning port or the speakers. If there is, use the methods discussed in this article to get water out of your iPhone and save it from short-circuiting. So, what methods do you use to remove water from your iPhone speaker, charging port, and camera? Have you used the rice trick or sound apps to fix a water-damaged iPhone? Or did silica gel work better for you? Let us know in the comments section below.
