Pin Notes in Apple Notes App on iPhone, iPad, and Mac
Before we proceed with this guide, don’t forget to check our other guides on Apple notes where we have discussed features like locking individual notes in Apple Notes, accessing notes from lock screen, sharing Notes app folders, and more. With that out of the way, let’s get to our tutorial, shall we? There are multiple ways to pin notes in Apple Notes, and we will cover all of them below. So, launch the Apple Notes app, and let’s begin.
Pinning a Note in Apple Notes App on iPhone and iPad
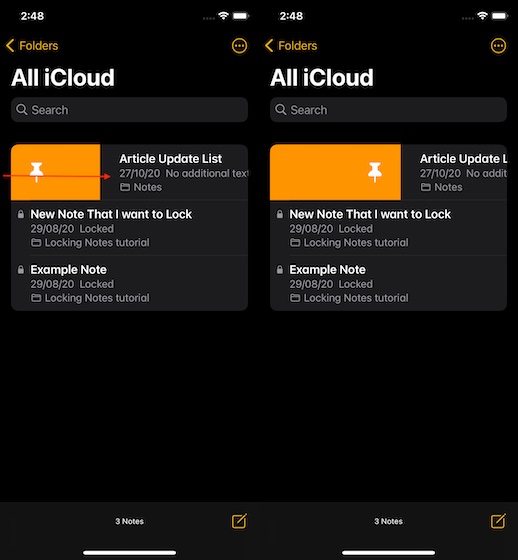
The easiest way to pin a note in Apple Note is by swiping from left-to-right on a note. You can either swipe the whole way to pin the note or swipe halfway and then tap on the pin icon.
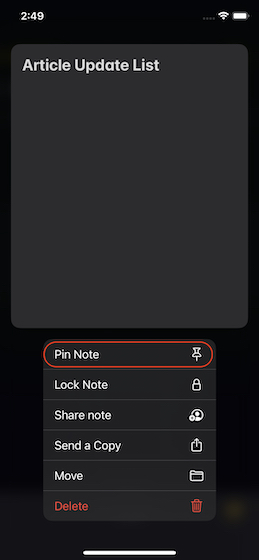
You can also pin a note by touching and holding a note (Haptic Touch) to open the context menu and selecting the “Pin Note” option.
To pin an open note, tap on the three-dot menu on the top-right and then tap on the “Pin” button.
Pinning a Note in Apple Notes App on Mac
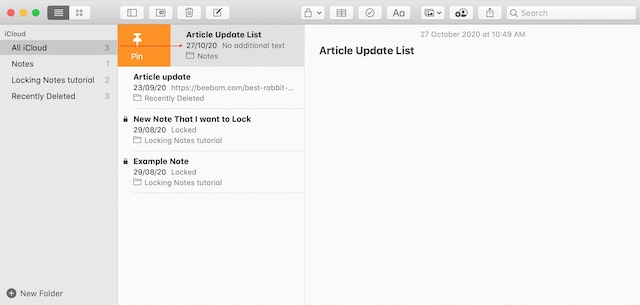
To pin a note on Mac, swipe left to right on the note with two-fingers. Just like on the iPhone, you can either swipe the whole way or stop mid way and then tap on the pin icon.
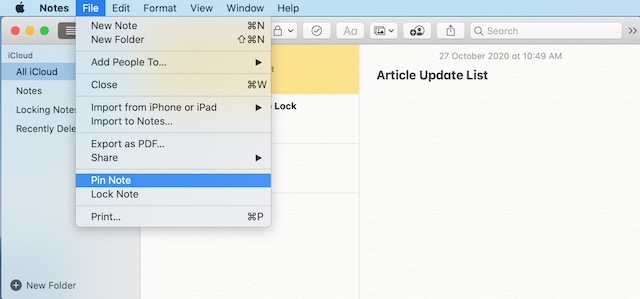
You can also pin a note by selecting it and then going to File -> Pin Note.
The final way to pin a note on Mac is by right-clicking on the note and choosing the Pin Note option.
Pin Notes at Top in Apple Notes App in iOS and macOS
As you can see, both iPhone (iPad) and Mac offer three different methods to pin a note. You can use any of the above methods that you remember to pin and unpin a note. For me, the easiest one to use and remember is swiping left to right on a note. Let me know your favorite method by writing in the comments below.


